There are two kinds of potato growers in this world. The ones who plant their seed potatoes, hill them once, and call it a day — and the ones who keep coming back to that row all summer long, piling on dirt and watching something remarkable happen underground. Which one you become depends on one thing: knowing what kind of potato you planted.
If you’ve ever dug up a potato plant and felt a little underwhelmed — or the opposite, completely shocked by what came out of the ground — I want to talk to you today. Because understanding the difference between determinate and indeterminate potatoes is genuinely one of those pieces of knowledge that changes how you grow. It changes how you plan. It changes what you do all summer long.
And once you know it, you’ll wonder how you ever gardened without it. Now that’s BombDiggity.
First Things First: What Are We Even Talking About?
Most of us learned the word “determinate” from tomatoes. But potatoes work the same way — they fall into two categories based on how and when they form their tubers, and how they respond to hilling.
Here’s the simplest way I know to say it:
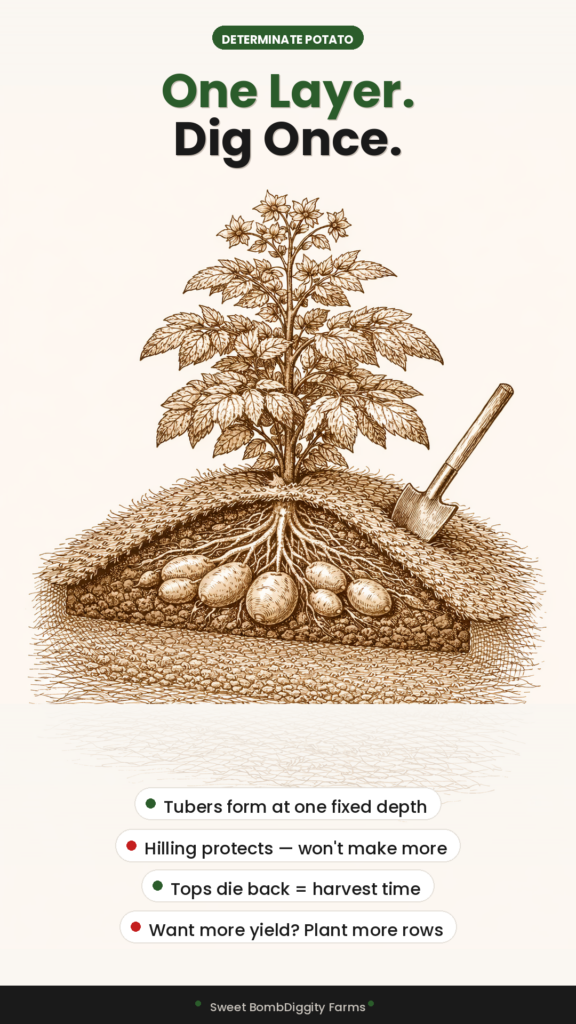
- Determinate potatoes form their tubers at a fixed point along the stem. Hill them a little if you’d like — it’ll protect the potatoes from light — but it’s not going to make more potatoes appear. What you planted is what you’ll get. One layer. Dig once.
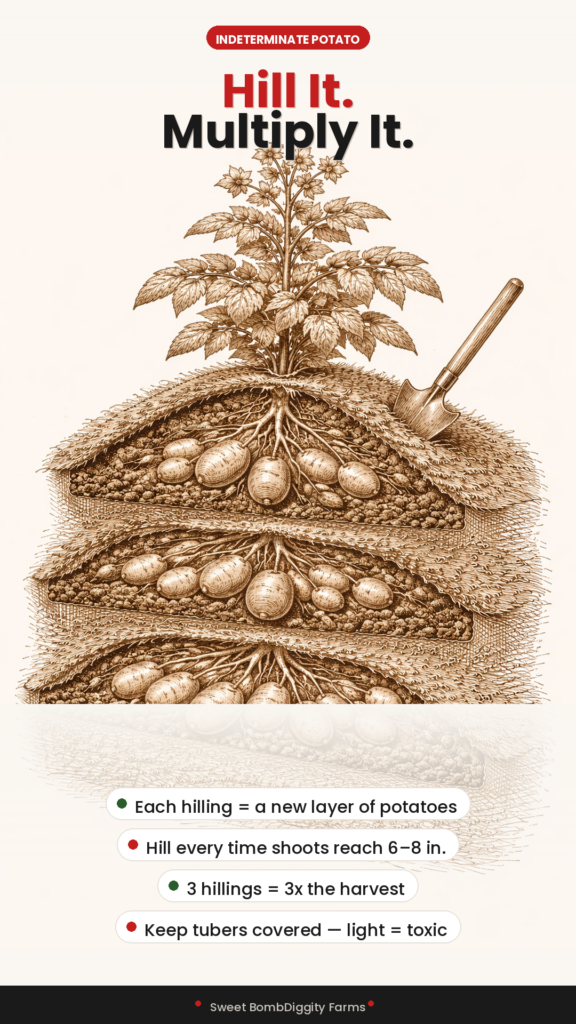
- Indeterminate potatoes keep forming new tubers along the stem as the plant grows taller. Every time you hill — mounding fresh soil up around the stem — you’re essentially giving the plant a new opportunity to produce another layer of potatoes. The more you hill, the more they grow.
Same garden. Same seed potato. Completely different relationship between you and that plant all season long.
Determinate Potatoes: Plant It, Hill It Once, Walk Away
Determinate varieties are the straightforward ones. They grow to a certain size, they set their tubers at a defined depth along the stolons (those little underground root-like structures that actually become your potatoes), and then they’re done. The plant puts all its energy into ripening what it’s already made.
These are your early-season potatoes. They tend to mature faster — often in 70 to 90 days — which makes them perfect if you’re gardening in a short season, want new potatoes by early summer, or just want to get something out of the ground before the heat of July sets in.
What hilling does (and doesn’t do) for determinate potatoes
A little hilling is still worth doing with determinate varieties — but for a different reason than you might think. When potatoes are exposed to sunlight, they turn green. Green potatoes contain solanine, which is toxic and bitter and means that potato is not going to your dinner table. Hilling keeps your tubers covered and protected from light. That’s the goal.
But here’s the thing to understand: hilling a determinate potato is not going to create new tuber-forming nodes the way it does with an indeterminate variety. The plant already determined where its potatoes were going to be. You can’t change that. If you go out there and mound dirt all the way up the stem in three rounds of aggressive hilling, you’re doing a lot of work for no extra harvest. Save that energy for your indeterminate rows.
When to harvest determinate potatoes
Watch the tops of your plant. When the foliage starts to die back and turn yellow, that’s your sign — your potatoes have reached maturity. Wait until the tops have fully died back, let the skins cure in the ground for a week or two if your conditions allow, and then dig. Everything will be in one layer, at a fairly consistent depth, and you’ll know exactly what you’ve got.
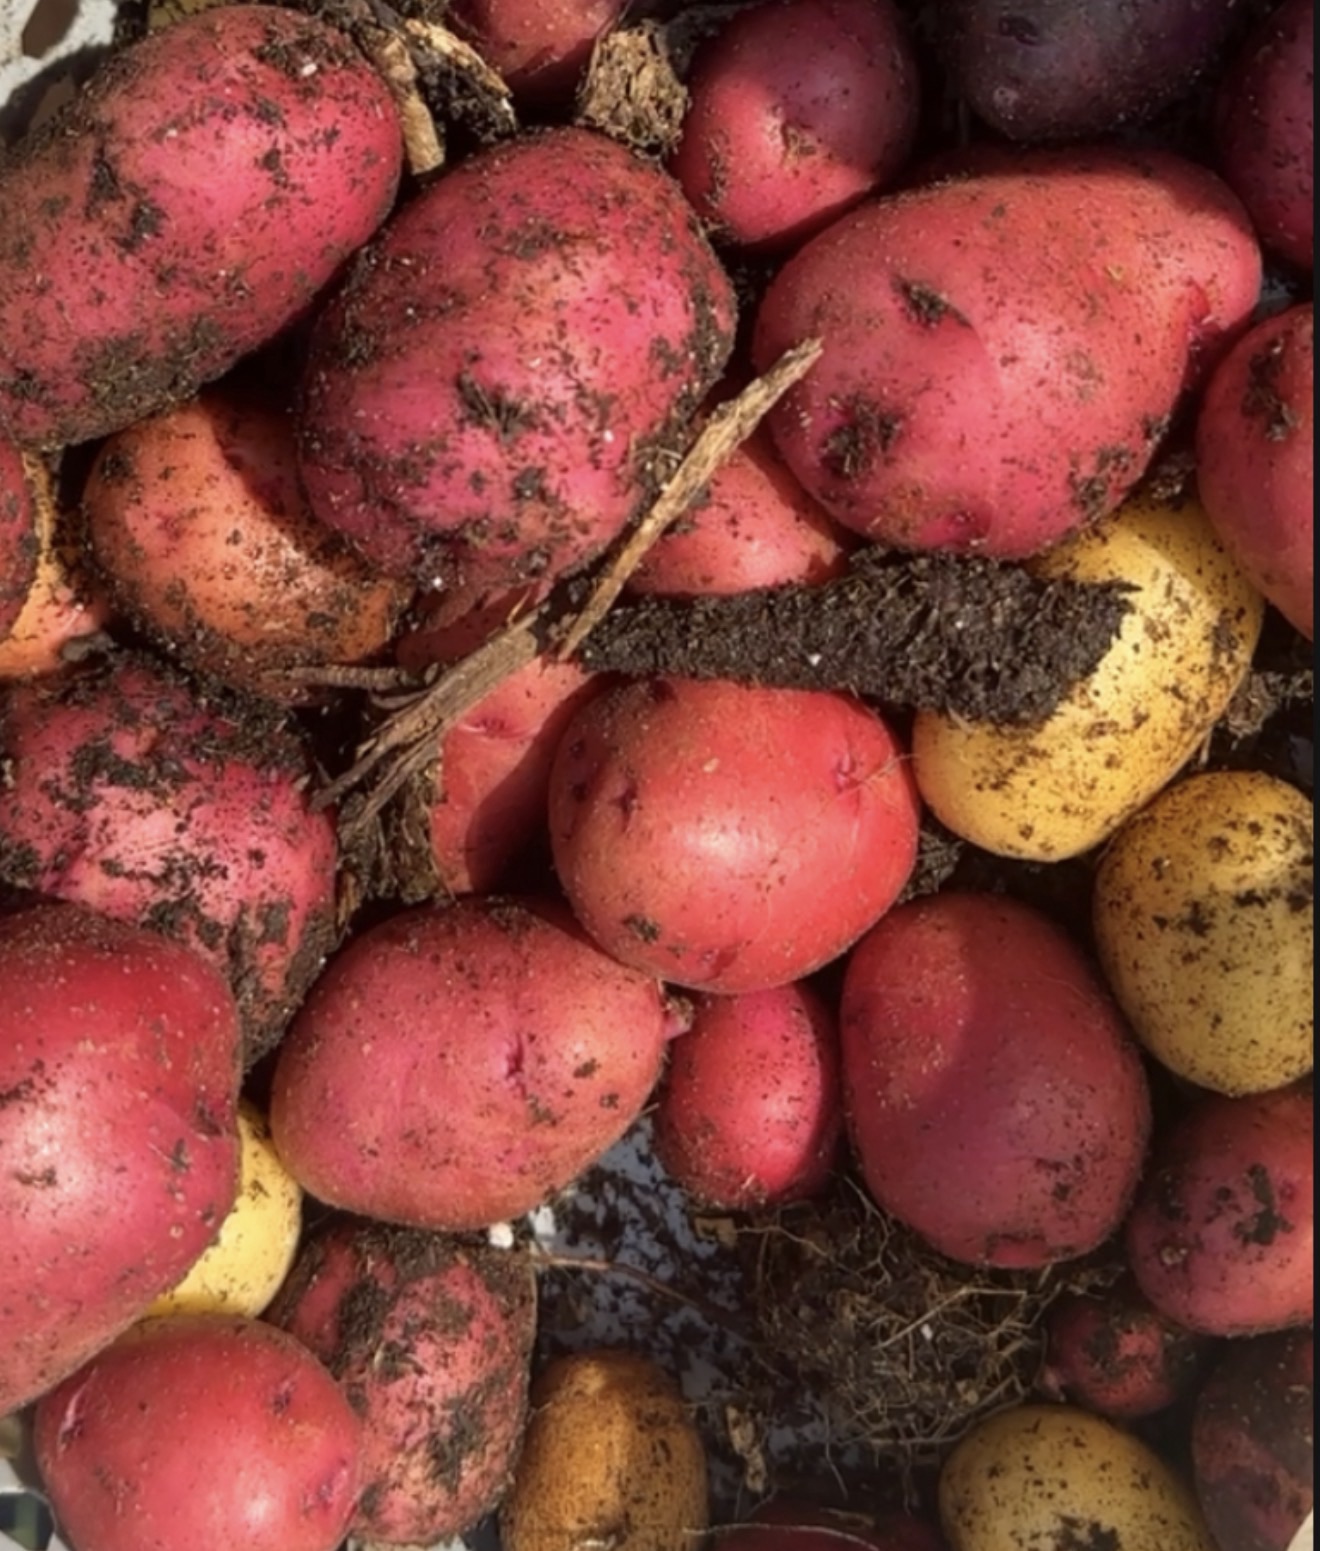
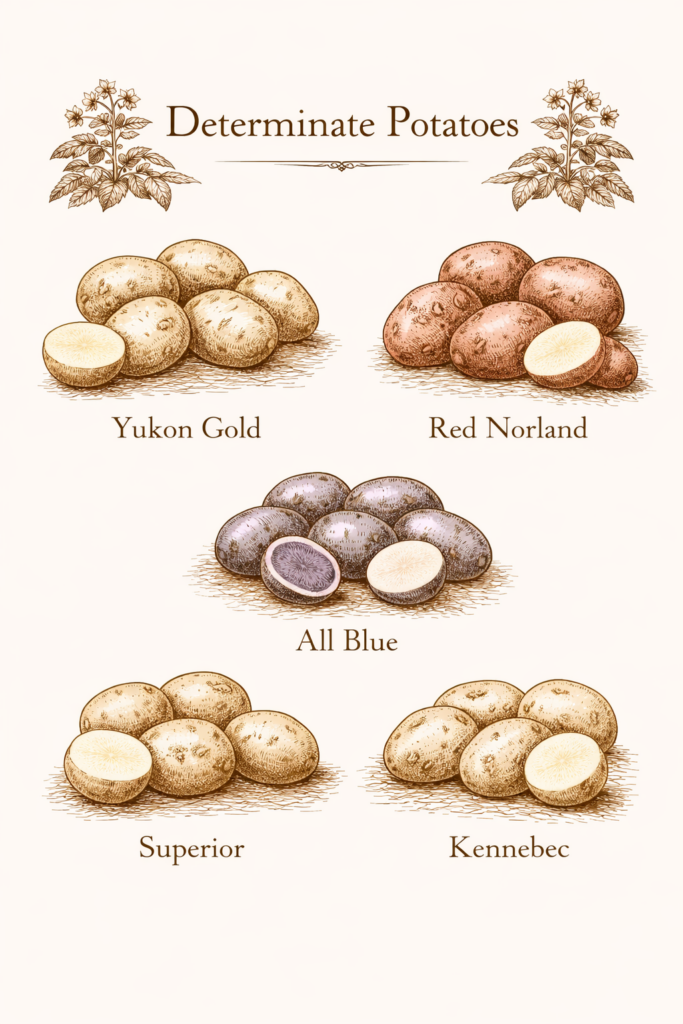
Great determinate varieties to grow
- Yukon Gold — Buttery, golden-fleshed, and absolutely gorgeous. One of the most beloved varieties in any kitchen garden. Matures early, produces reliably.
- Red Norland — A beautiful red-skinned early potato with white flesh. Great for boiling and salads. One of the first out of the ground each season.
- Kennebec — A classic American variety. Large, white-fleshed, great for baking and frying. Reliable and widely adaptable.
- Chieftain — A red-skinned variety with smooth skin that holds its color beautifully after cooking. Excellent flavor.
- Irish Cobbler — An old-fashioned variety with a wonderful, starchy flavor. Matures very early. Perfect if you’re after that nostalgic new-potato experience.
Indeterminate Potatoes: Hill It, Hill It Again, Then Hill It One More Time
Indeterminate potatoes are where things get really exciting — and really rewarding if you’re willing to put in the work.
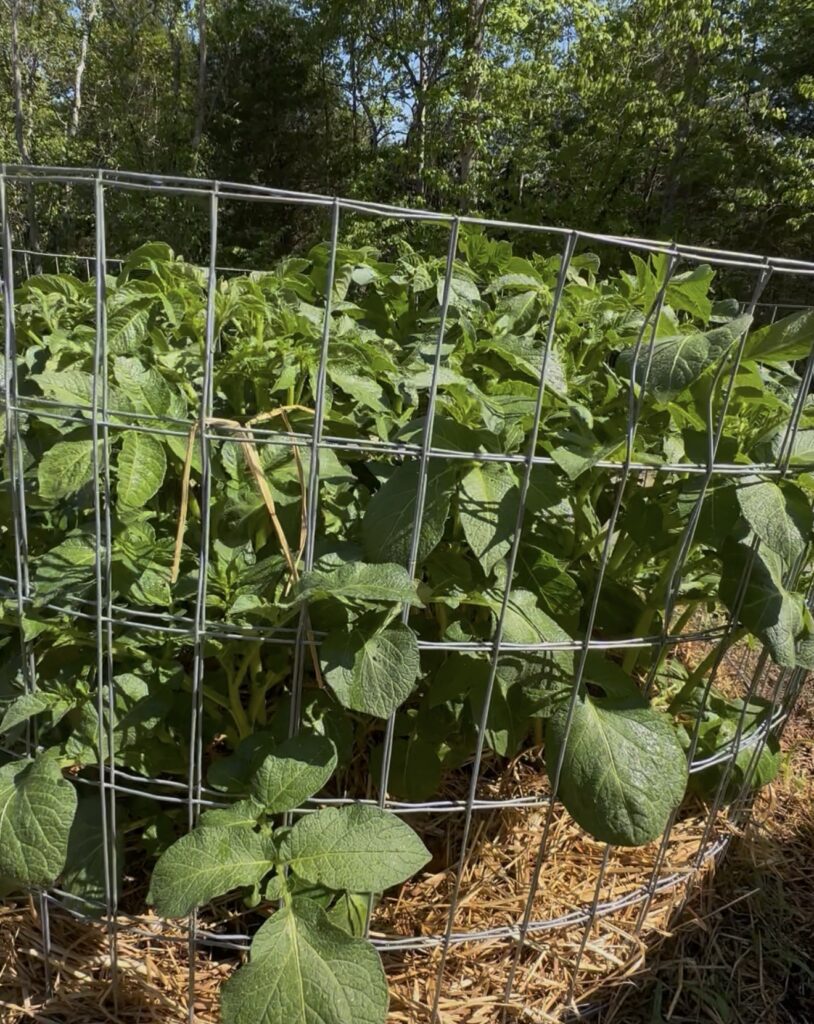
These varieties produce tubers all along the buried portion of the stem. Which means the more stem you bury through hilling, the more opportunities the plant has to set potatoes. You are literally creating the conditions for more harvest every single time you come back out to that row with your hoe.
Picture it this way: you plant your seed potato. The plant grows up. You hill. The buried stem sets a layer of potatoes at that depth. The plant keeps growing up. You hill again. Another layer forms below the new soil surface. You hill one more time. Another layer. By the end of the season, you might be digging through three distinct layers of potatoes from a single plant. That’s the magic of an indeterminate variety and why so many serious growers love them.
How to hill indeterminate potatoes the right way
The timing matters. Here’s the rhythm I use:
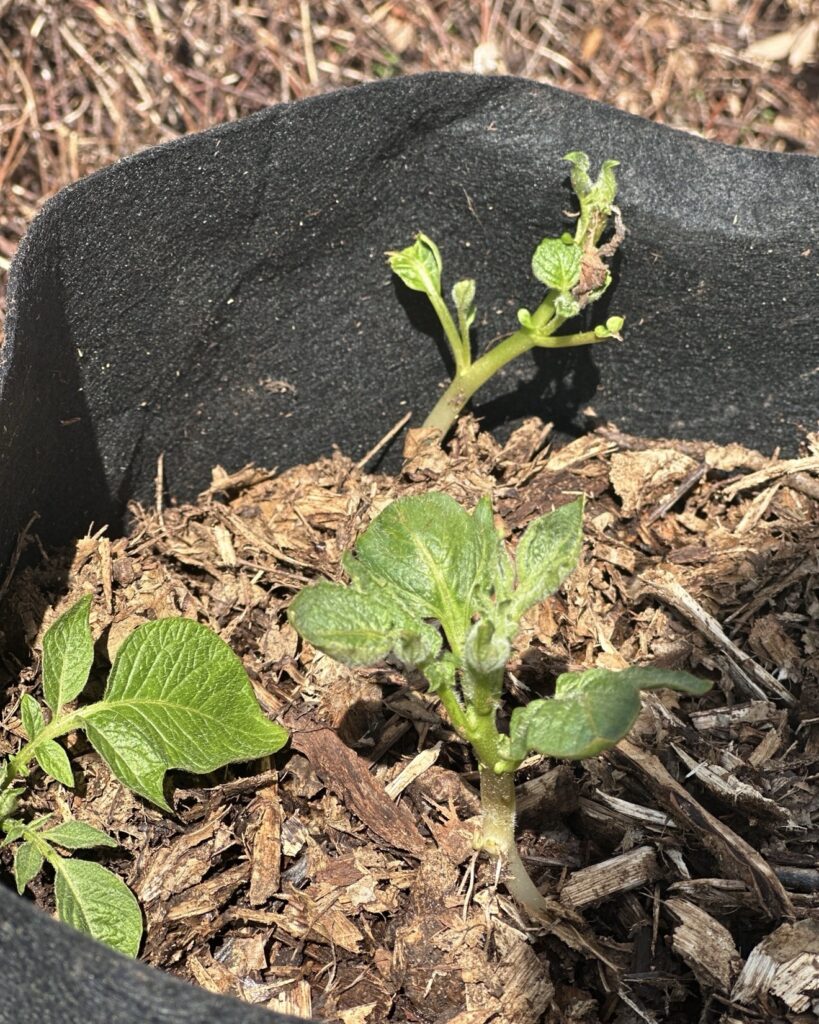
- First hilling: When your shoots reach about 6 to 8 inches above the soil surface, mound dirt up around the stem, leaving just the top few inches of foliage showing. Don’t be shy — you want to bury a good portion of that stem.
- Second hilling: Give the plant another week or two, let it grow up 6 to 8 inches again, and repeat. Same process — mound soil up generously.
- Third hilling: Do it one more time. By now you may have a significant mound built up. That’s exactly what you want. All that buried stem is setting tubers.
After your third hilling, let the plant do its thing. Keep the soil consistently moist but not waterlogged. Stop hilling once the plant flowers — at that point the tubers are already forming and setting, and you don’t want to disturb the process.
A few things to keep in mind
Consistent moisture is everything with indeterminate varieties. Irregular watering — especially letting the soil dry out and then flooding it — can cause hollow heart (exactly what it sounds like: a hollow cavity inside the potato) or cracking. Aim for about 1 to 2 inches of water per week, more during hot spells.
And watch for greening. The more aggressively you hill, the more protection your tubers have from light — which is a good thing. But check your mounds after heavy rain, which can wash soil away and expose potatoes. Cover them back up quickly.
When to harvest indeterminate potatoes
Same signal as determinates — when the foliage dies back, you’re ready. The difference is that your harvest is going to be more dramatic. Plan to dig carefully, because you’ll find potatoes at multiple depths. Work from the outside of the plant inward with a fork, going deep. You don’t want to stab the beauties you worked all summer for.
Great indeterminate varieties to grow
- Russet Burbank — The king of the baking potato. Long, starchy, and the reason french fries exist. A heavy producer when given room to grow and hilled consistently.
- German Butterball — A gorgeous, golden-fleshed potato with rich, buttery flavor. One of those varieties that makes people stop and ask what on earth you’re feeding them.
- Purple Majesty — Deep purple inside and out, packed with antioxidants, and absolutely stunning on a plate. A showstopper in the garden and the kitchen.
- All Blue — Another beautiful blue-purple variety that holds its color when cooked. Excellent for roasting.
- Nicola — A waxy, yellow-fleshed variety with exceptional flavor. Great for salads, roasting, and eating straight out of the garden.
- La Ratte — A French fingerling with an almost chestnut-like flavor. Small, elegant, and completely worth the effort.

Planting Potatoes: The Foundations That Matter
Whether you’re growing determinate or indeterminate varieties, the planting basics are the same — and getting them right sets up everything that comes after.
Start with certified seed potatoes
I know the temptation. You’ve got potatoes in the pantry that are already sprouting. But grocery store potatoes are often treated with a sprout inhibitor, and they haven’t been tested for disease. Certified seed potatoes from a reputable source have been inspected and are guaranteed to be disease-free. It’s worth the investment, especially for a crop you’re going to put significant work into.
Timing your planting
Potatoes want to go in the ground when the soil has reached at least 45°F and preferably 50°F. Here in East Tennessee we’re typically looking at late March to mid-April, depending on the year. Don’t rush it — cold, wet soil leads to rot, not potatoes.
That said, potatoes are more cold-tolerant than many vegetables. A light frost after emergence won’t necessarily kill your plants, though a hard freeze will. Know your last frost date and plan accordingly.
How to prepare your seed potatoes
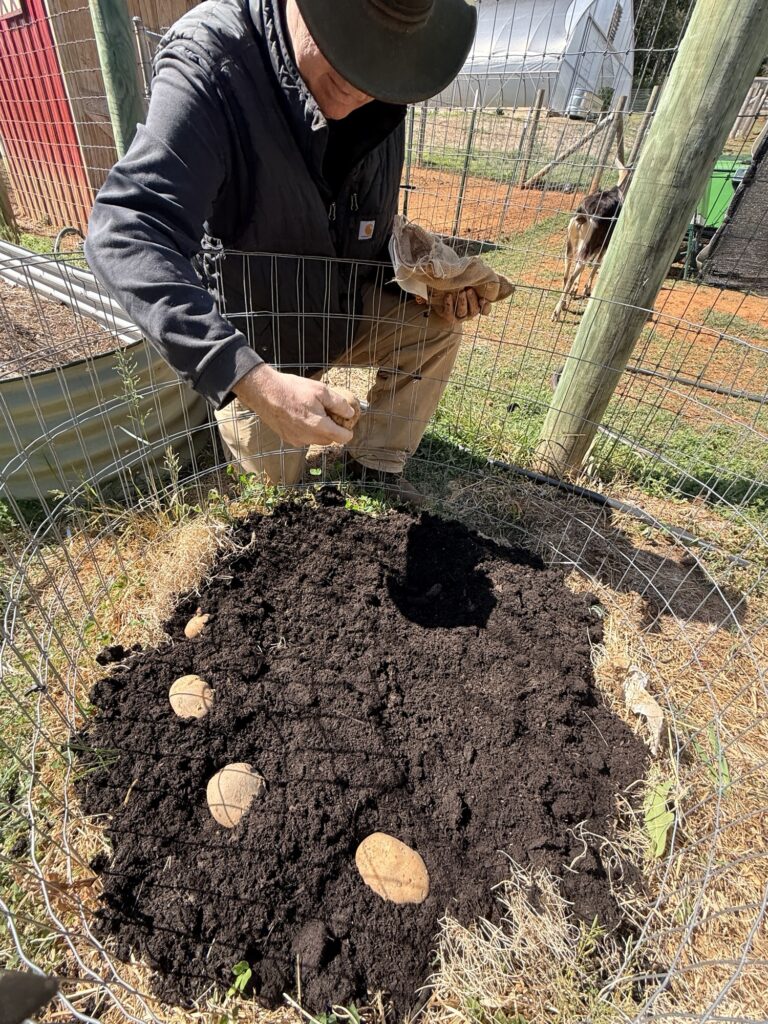
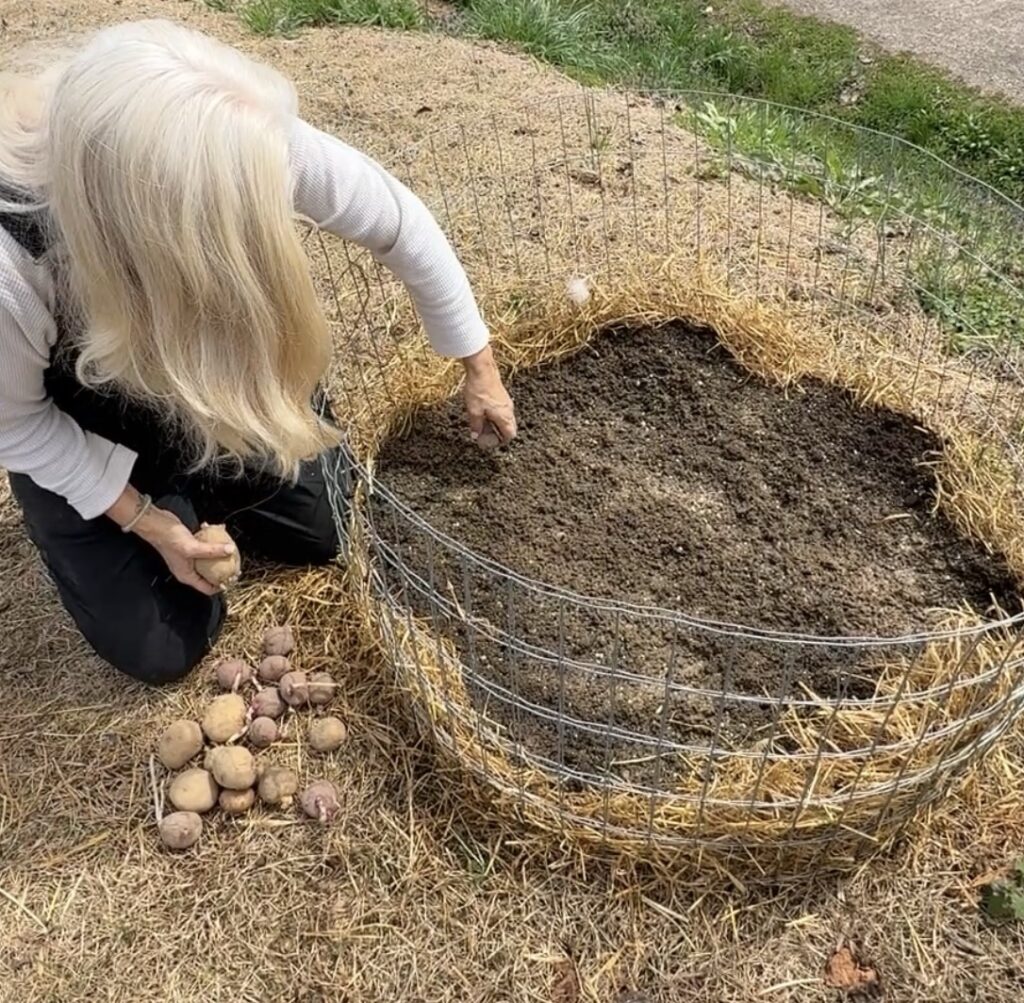
If your seed potatoes are small — about the size of a golf ball or smaller — plant them whole. For larger ones, cut them into pieces, making sure each piece has at least one or two “eyes” (those little sprout points). After cutting, let them cure at room temperature for a day or two before planting. The cut surface will callous over, which helps prevent rot in the soil.
Planting depth and spacing
Plant seed potatoes about 3 to 4 inches deep in a trench, eyes facing up, spaced roughly 12 inches apart in the row. Rows should be about 2.5 to 3 feet apart to give you room to hill.
If you’re growing in raised beds, you can plant a bit closer — but make sure you have enough depth in your bed for hilling. Indeterminate varieties especially need room to grow vertically underground.
Soil matters — a lot
Potatoes love loose, well-draining, slightly acidic soil (pH around 5.0 to 6.5). Heavy clay soil is their enemy — it compresses around the tubers, limits their growth, and makes harvesting a miserable experience. Amend heavy soil with compost, aged manure, or other organic matter before planting.
A word of caution: avoid adding lime to your potato bed. Most vegetables love it, but lime raises soil pH and can contribute to scab, a common potato disease that creates rough, corky patches on the skin. Your potatoes will still be edible — but they won’t be pretty.
Fertilizing
Potatoes are heavy feeders. Work a balanced fertilizer or compost into your soil before planting. Once the plants are growing, side-dress with a low-nitrogen fertilizer when you hill — too much nitrogen encourages leafy growth at the expense of tubers. You want the plant’s energy going down into the ground, not up into the canopy.
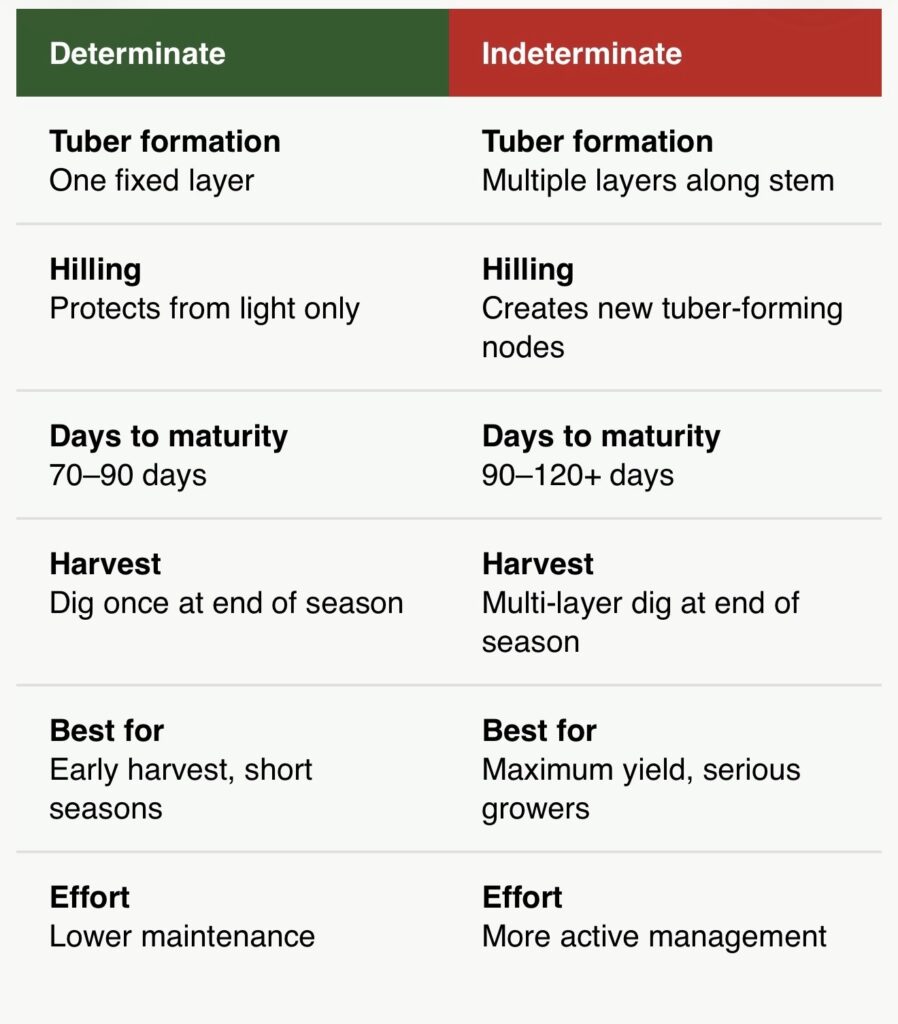
Determinate vs. Indeterminate at a Glance
Common Potato Growing Problems (And How to Handle Them)
Hollow heart
That disappointing moment when you cut open a beautiful potato and find a hollow cavity inside. Usually caused by uneven watering or rapid growth spurts. Keep moisture consistent and don’t over-fertilize with nitrogen.
Potato scab
Rough, corky patches on the skin. More of a cosmetic issue than anything — scabby potatoes are still good to eat. Caused by a soil-borne organism that thrives in alkaline soil. Keep pH on the lower side and avoid lime in potato beds.
Late blight
The disease that caused the Irish Potato Famine, and still a real concern today. Shows up as dark, water-soaked spots on leaves and stems that spread rapidly in wet, cool conditions. If you see it, act fast — remove affected plants and do not compost them. Choose blight-resistant varieties if you’re in a region with humid summers.
Green potatoes
Exposure to light causes potatoes to produce solanine, which is toxic. Green potatoes should be discarded, not eaten. Hill consistently and store harvested potatoes in complete darkness.
Wireworms
Slender, hard-bodied larvae that tunnel through tubers, leaving small holes. Rotate your potato bed every year and till the soil in fall to expose and kill overwintering larvae.
Storing Your Harvest
All that hard work deserves a good finish. Proper curing and storage is what stands between a beautiful harvest and a pile of mush by October.
After digging, let your potatoes cure at around 50 to 60°F with high humidity for one to two weeks. This allows the skins to thicken and any small cuts or nicks to heal over — significantly extending their storage life.
Once cured, move them to cool, dark, well-ventilated storage. A root cellar is ideal. A cool basement corner works well. The goal is 38 to 45°F, darkness, and airflow. Do not store potatoes near apples or onions — apples release ethylene gas that speeds sprouting, and onions and potatoes stored together cause both to go off more quickly.
Stored properly, determinate varieties will typically keep for two to three months. Indeterminate late-season varieties, which tend to have thicker skins, can last four to six months or more.
Growing Potatoes With Intention
Here’s what I want you to take away from all of this. Growing potatoes — really understanding what’s happening underground while that plant is doing its work above the soil — is one of the most satisfying things you can do in a kitchen garden. There’s something almost miraculous about it. You put something small in the ground. You tend it. You come back weeks later and pull out pounds of food.
But the way you tend it matters. With a determinate variety, your job is to plant well, hill once for protection, and trust the process. With an indeterminate variety, your job is to stay engaged — to keep coming back to that row, to keep building up that mound, to keep giving the plant what it needs to do something remarkable.
Either way, you’re growing with purpose. You’re not just putting seeds in the dirt and hoping for the best. You’re making intentional decisions based on what the plant actually needs. And that’s what makes a garden flourish.
That’s what makes a life flourish, too.
Now get out there and grow something good. That’s BombDiggity.
Have questions about which varieties grow best in your region, or want to share what you’re growing this season? Drop a comment below — I love hearing from this community.
And if you found this helpful, share it with a friend who’s been wondering why their potato harvest looked a little lackluster. This might be exactly what they need to read.